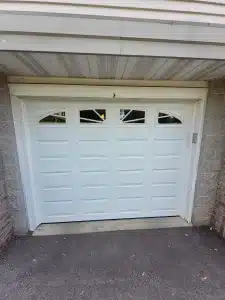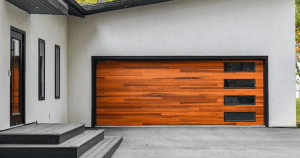
It is 7 in the morning, the temperature outside is below freezing, and the garage door remote just stopped working. For homeowners in Sussex, WI, this is more common than most people think. Wisconsin winters put serious strain on garage door systems, but the good news is that programming or reprogramming a LiftMaster garage door opener is something most homeowners can handle on their own with the right steps. And when things go beyond a simple fix, knowing where to turn for garage door opener repair makes all the difference.
LiftMaster is one of the most trusted garage door opener brands in the country, widely used in homes across Sussex and throughout Waukesha County. Whether the goal is to program a new remote, set up a wireless keypad, sync a car’s built-in HomeLink system, or connect the MyQ smart app, this guide covers everything in plain, simple language. No technical background needed.
Gather These Things Before You Start Programming Your LiftMaster
Before touching anything, make sure the following items are ready. Skipping this step is one of the most common reasons the programming process fails halfway through.
Here is what to have on hand:
- The LiftMaster motor unit model number (printed on a label on the back or side of the unit hanging from your garage ceiling)
- The remote control, wireless keypad, or car system being programmed
- A sturdy ladder to safely reach the motor head unit
- The original owner’s manual, or access to the LiftMaster support website as a backup
Pro Tip for Sussex, WI Homeowners: If the garage door opener unit is more than 10 years old, it may use an older radio frequency that limits compatibility with newer remotes and accessories. Before buying a replacement remote, check the model number and confirm compatibility on the LiftMaster website.
For a deeper dive into remote options, compatibility, and security features, check out this related read: LiftMaster Garage Door Opener Remote in Sussex: Easy Access & Security.
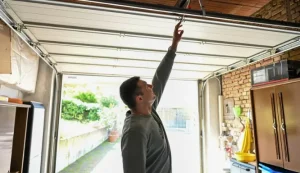
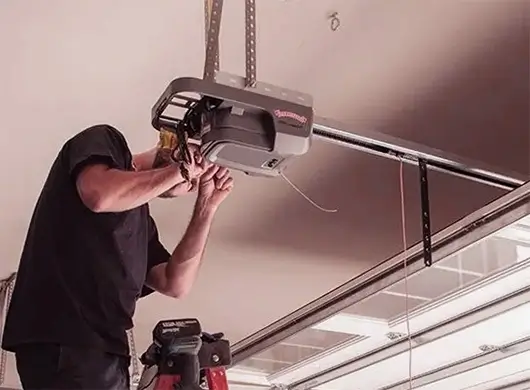
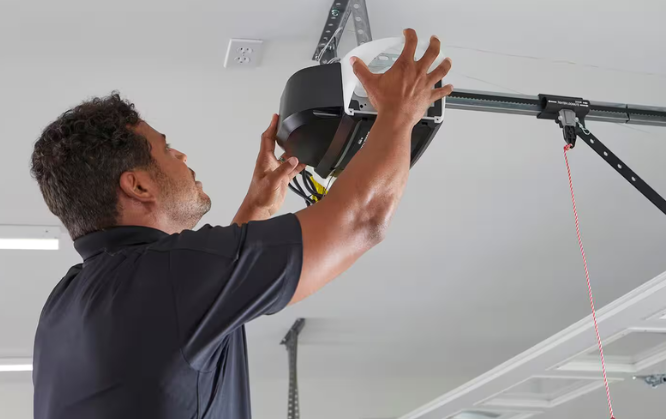
The LiftMaster LEARN Button Is the Key to Everything

The LEARN button is the most important part of the programming process. Think of it as the command center for any device being synced to the opener.
Every LiftMaster motor unit has a LEARN button, but not all LEARN buttons are the same. The color of the button tells which frequency the opener uses, and that determines which remotes and accessories are compatible.
Here is a breakdown of LEARN button colors:
LEARN Button Color | Frequency | Compatible System |
Yellow | 390 MHz | Older LiftMaster models |
Purple | 390 MHz | Security+ models |
Red or Orange | 315 MHz | Newer Security+ models |
Green | 310 MHz | Select older models |
Yellow (with LEARN printed) | 893MAX | Security+ 2.0 |
Why this matters: Buying a remote that does not match the opener’s frequency is one of the most common and frustrating mistakes homeowners in Sussex and Waukesha County make. Always confirm the LEARN button color before purchasing any new remote or accessory.
What to check: If the LEARN button is hard to find, look near the antenna wire that hangs down from the motor unit. It is usually located next to the light cover on the back panel of the opener.
If the LEARN button is acting up or the opener is showing other warning signs, this related guide breaks it all down: How to Troubleshoot Your LiftMaster Garage Door Opener: Easy Steps.
Step-by-Step: How to Program a LiftMaster Remote Control
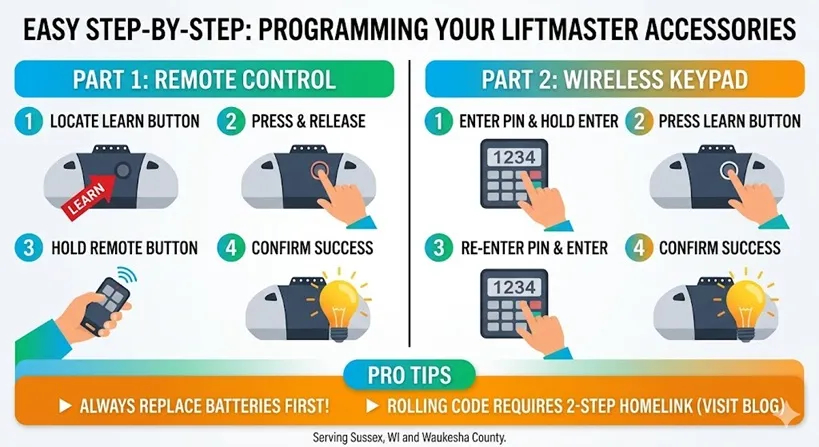
This is the most common programming task for LiftMaster owners. Whether it is a brand-new remote or one that needs to be re-synced, follow these steps carefully.
Steps to Program a LiftMaster Remote:
- Stand inside the garage and locate the LEARN button on the motor unit. Use a ladder if needed.
- Press and release the LEARN button. A small indicator light will glow for approximately 30 seconds.
- Within those 30 seconds, press and hold the button on the remote control.
- Hold it until the opener’s light bulb blinks, or until two clicking sounds are heard from the motor unit.
- Release the remote button.
- Test the remote from a normal distance to confirm the
programming worked.
Tip to Avoid Programming Failure: Always replace the remote battery before starting the programming process. A weak or dying battery is the number one reason remote programming fails on the first attempt. This is a small step that saves a lot of frustration.
What to Check if It Does Not Work:
- Make sure the remote is within range of the motor unit during programming
- Confirm the remote model is compatible with the LEARN button color
- Check if the 30-second window expired before completing the steps (it happens faster than expected)
Good to Know: The LiftMaster LEARN button can only store a limited number of remote devices. If it has been used to program many devices over the years, older ones may have been overwritten. Pressing and holding the LEARN button for about 6 seconds will erase all previously stored devices, giving a clean slate to start fresh.
Speaking of batteries, knowing when and how to replace them properly makes a big difference in opener performance. Get the full breakdown here: How to Replace Garage Door Opener Battery: The Complete Guide.
How to Program a LiftMaster Wireless Keypad
A wireless keypad mounted outside the garage gives entry without needing a remote or a key. It is a popular option for families in Sussex, WI, who want quick access without fumbling for a remote in the cold.
Steps to Program a LiftMaster Wireless Keypad:
- On the wireless keypad, enter a new 4-digit PIN of choice.
- Press and hold the ENTER button on the keypad until the opener’s light blinks.
- Immediately go to the motor unit and press the LEARN button.
- Return to the keypad and enter the same 4-digit PIN again.
- Press the ENTER button once more.
- A blink from the opener light confirms the keypad has been successfully programmed.
Security Tip for Sussex Homeowners: Avoid using obvious PIN numbers like 1234, 0000, or a birth year. Since the keypad is visible outside the home, choosing a less predictable number adds a layer of security, especially in residential neighborhoods throughout Waukesha County.
What to Check if the Keypad Is Not Responding:
- Check if the battery cover is fully and firmly snapped into place. A slightly loose cover breaks the electrical circuit and prevents the keypad from working at all.
- Look for signs of moisture damage inside the keypad, which is a common issue during Wisconsin’s rainy springs and snowy winters.
- Replace the keypad battery if it has not been changed in over a year.
How to Program a LiftMaster Opener to a Car’s Built-In HomeLink System
Many modern vehicles come with a built-in garage door button system called HomeLink. It is usually found on the rearview mirror or the overhead console of the car. This eliminates the need to carry a separate remote entirely.
Programming HomeLink to a LiftMaster opener with rolling code technology requires a two-step process. This is the step most DIYers miss, and it is the number one reason HomeLink fails to work after setup.
Steps to Program LiftMaster to HomeLink:
- Clear the existing HomeLink memory by pressing and holding the two outer HomeLink buttons simultaneously for about 20 seconds until the indicator light changes.
- Hold the LiftMaster remote approximately 1 to 3 inches away from the HomeLink button in the car.
- Press and hold both the remote button and the desired HomeLink button at the same time.
- Continue holding until the HomeLink indicator light changes from a slow blink to a rapid blink. This may take up to 60 seconds.
- Release both buttons.
- Go to the LiftMaster motor unit inside the garage and press the LEARN button.
- Return to the vehicle within 30 seconds and press the HomeLink button twice.
- A blink from the opener light confirms successful programming.
Important Note: Vehicles manufactured in 2004 and later require this full two-step rolling code process. Skipping step 6, which involves pressing the LEARN button on the motor unit, is the most frequently missed step by homeowners attempting this on their own.
Tip: If the car is parked far from the garage during setup, the signal may not reach the motor unit in time. Park inside or directly in front of the garage for the best results.
How to Set Up the LiftMaster MyQ Smart App
MyQ is LiftMaster’s smart home technology that allows homeowners to open, close, and monitor their garage door using a smartphone from anywhere in the world. For Sussex, WI, homeowners who travel for work or want added security, this feature is a game-changer.
Requirements:
- A MyQ-compatible LiftMaster opener (check the model number on the LiftMaster website)
- A Wi-Fi hub or a MyQ-enabled motor unit
- A smartphone with the MyQ app installed
Steps to Set Up MyQ:
- Download the MyQ app from the App Store or Google Play.
- Create a free MyQ account using an email address.
- Inside the app, select “Add Device” and follow the prompts.
- Enter the serial number found on the motor unit label.
- Connect the device to the home’s Wi-Fi network.
- Follow the in-app instructions to complete setup.
Sussex, WI Homeowner Tip: MyQ is especially useful during Wisconsin winters. Instead of stepping outside into the cold to check if the garage was left open, simply open the app and check or close it from the couch. It also sends real-time alerts whenever the garage door opens or closes, adding a strong layer of home security.
LiftMaster Will Not Program? Check These Common Problems First
Sometimes programming does not go as planned. Before calling a technician, run through these common issues and solutions.
Problem 1: Remote Will Not Sync
- What to check: Battery strength, distance from the motor unit, and whether the LEARN button was pressed correctly
- Tip: Stand directly under the motor unit during programming for the strongest signal
Problem 2: Keypad Buttons Are Not Responding
- What to check: Battery life and whether moisture has gotten inside the keypad housing
- Tip: Replace keypad batteries every 1 to 2 years, especially before Wisconsin winters set in
Problem 3: LEARN Button Light Will Not Stay On
- What to check: Power supply to the unit and whether a circuit breaker has tripped
- Solution: Unplug the opener from the power outlet, wait 30 seconds, and plug it back in to reset the system
Problem 4: Opener Works Inconsistently
- What to check: The antenna wire hanging from the motor unit. It should hang straight down and not be coiled or bent.
- Tip: Avoid placing metal shelving or large metal objects near the opener, as metal surfaces cause radio signal interference that disrupts remote communication
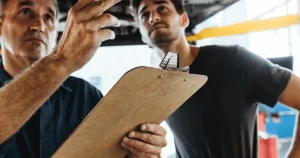
When to Call a Professional in Sussex, WI:
If all of the above steps have been tried and the LiftMaster still will not program correctly, there may be a deeper issue, such as a faulty logic board inside the motor unit. Logic board problems are beyond basic DIY repair. The average cost for a logic board repair or replacement is in the low-to-mid range, depending on the model, and a certified garage door technician serving the Sussex and Waukesha County area can diagnose the issue quickly and accurately.
Do not ignore persistent programming issues. A garage door that does not respond reliably is not just an inconvenience; it is a safety and security concern for the home and family.
Maintenance Tips That Prevent Programming Problems Year-Round
Most LiftMaster programming problems do not come out of nowhere. They are usually the result of neglected maintenance over time. Staying on top of basic upkeep keeps the opener running reliably through every Wisconsin season.
Maintenance Checklist for Sussex, WI Homeowners:
- Lubricate the drive system every 6 months: Whether the opener uses a chain, belt, or screw drive, applying a garage door-specific lubricant before winter hits keeps the mechanism running smoothly in cold temperatures.
- Test the auto-reverse safety feature monthly: Place a 2×4 flat on the ground under the door. If the door does not reverse immediately upon contact, the safety sensors need adjustment.
- Keep the area around the LEARN button clean: Dust and debris can interfere with the button’s sensitivity over time.
- Replace remote batteries every year: Even if the remote still works, proactive battery replacement prevents unexpected failures.
- Schedule a professional tune-up at least once a year: A certified technician can spot worn parts, misaligned tracks, and electrical issues before they become expensive repairs.
Wisconsin winters are tough on garage door hardware. Freezing temperatures, ice buildup, humidity changes, and repeated freeze-thaw cycles all accelerate wear on springs, cables, and electronic components. Homeowners in Sussex and across Waukesha County who stay ahead of maintenance calls are far less likely to face emergency repair situations in the dead of winter.
Keep Your LiftMaster Running Right in Sussex, WI
Programming a LiftMaster garage door opener is straightforward with the right steps. Most homeowners in Sussex, WI, can handle remote setup, keypad programming, HomeLink syncing, and MyQ connection on their own. The keys are simple: know the LEARN button color, stay within the 30-second window, replace batteries before starting, and never skip the rolling code step for HomeLink.
When problems go beyond basic programming, such as logic board failures, wiring issues, or persistent sensor malfunctions, reaching out to a certified garage door professional is the smartest move. A trusted technician serving Sussex, WI, and Waukesha County can diagnose the problem fast and get the door running safely again, even in the middle of a Wisconsin winter. And if the opener is too far gone to repair, a professional garage door opener installation ensures the new unit is set up correctly and safely from day one.
Need a Hand? Professional Garage Door Help Is Right Here in Sussex, WI
For homeowners in Sussex, WI who want reliable, professional garage door service they can count on, Anytime Garage Doors has been a trusted name in the Waukesha County community. From LiftMaster programming and repairs to full installations and seasonal tune-ups, our team brings the expertise, professionalism, and local knowledge that every homeowner deserves. No job is too small, and no problem is too complicated when it comes to keeping your garage door safe, secure, and running at its best year-round. Ready to get your LiftMaster working perfectly? Contact us today or give us a call and let us handle the rest.